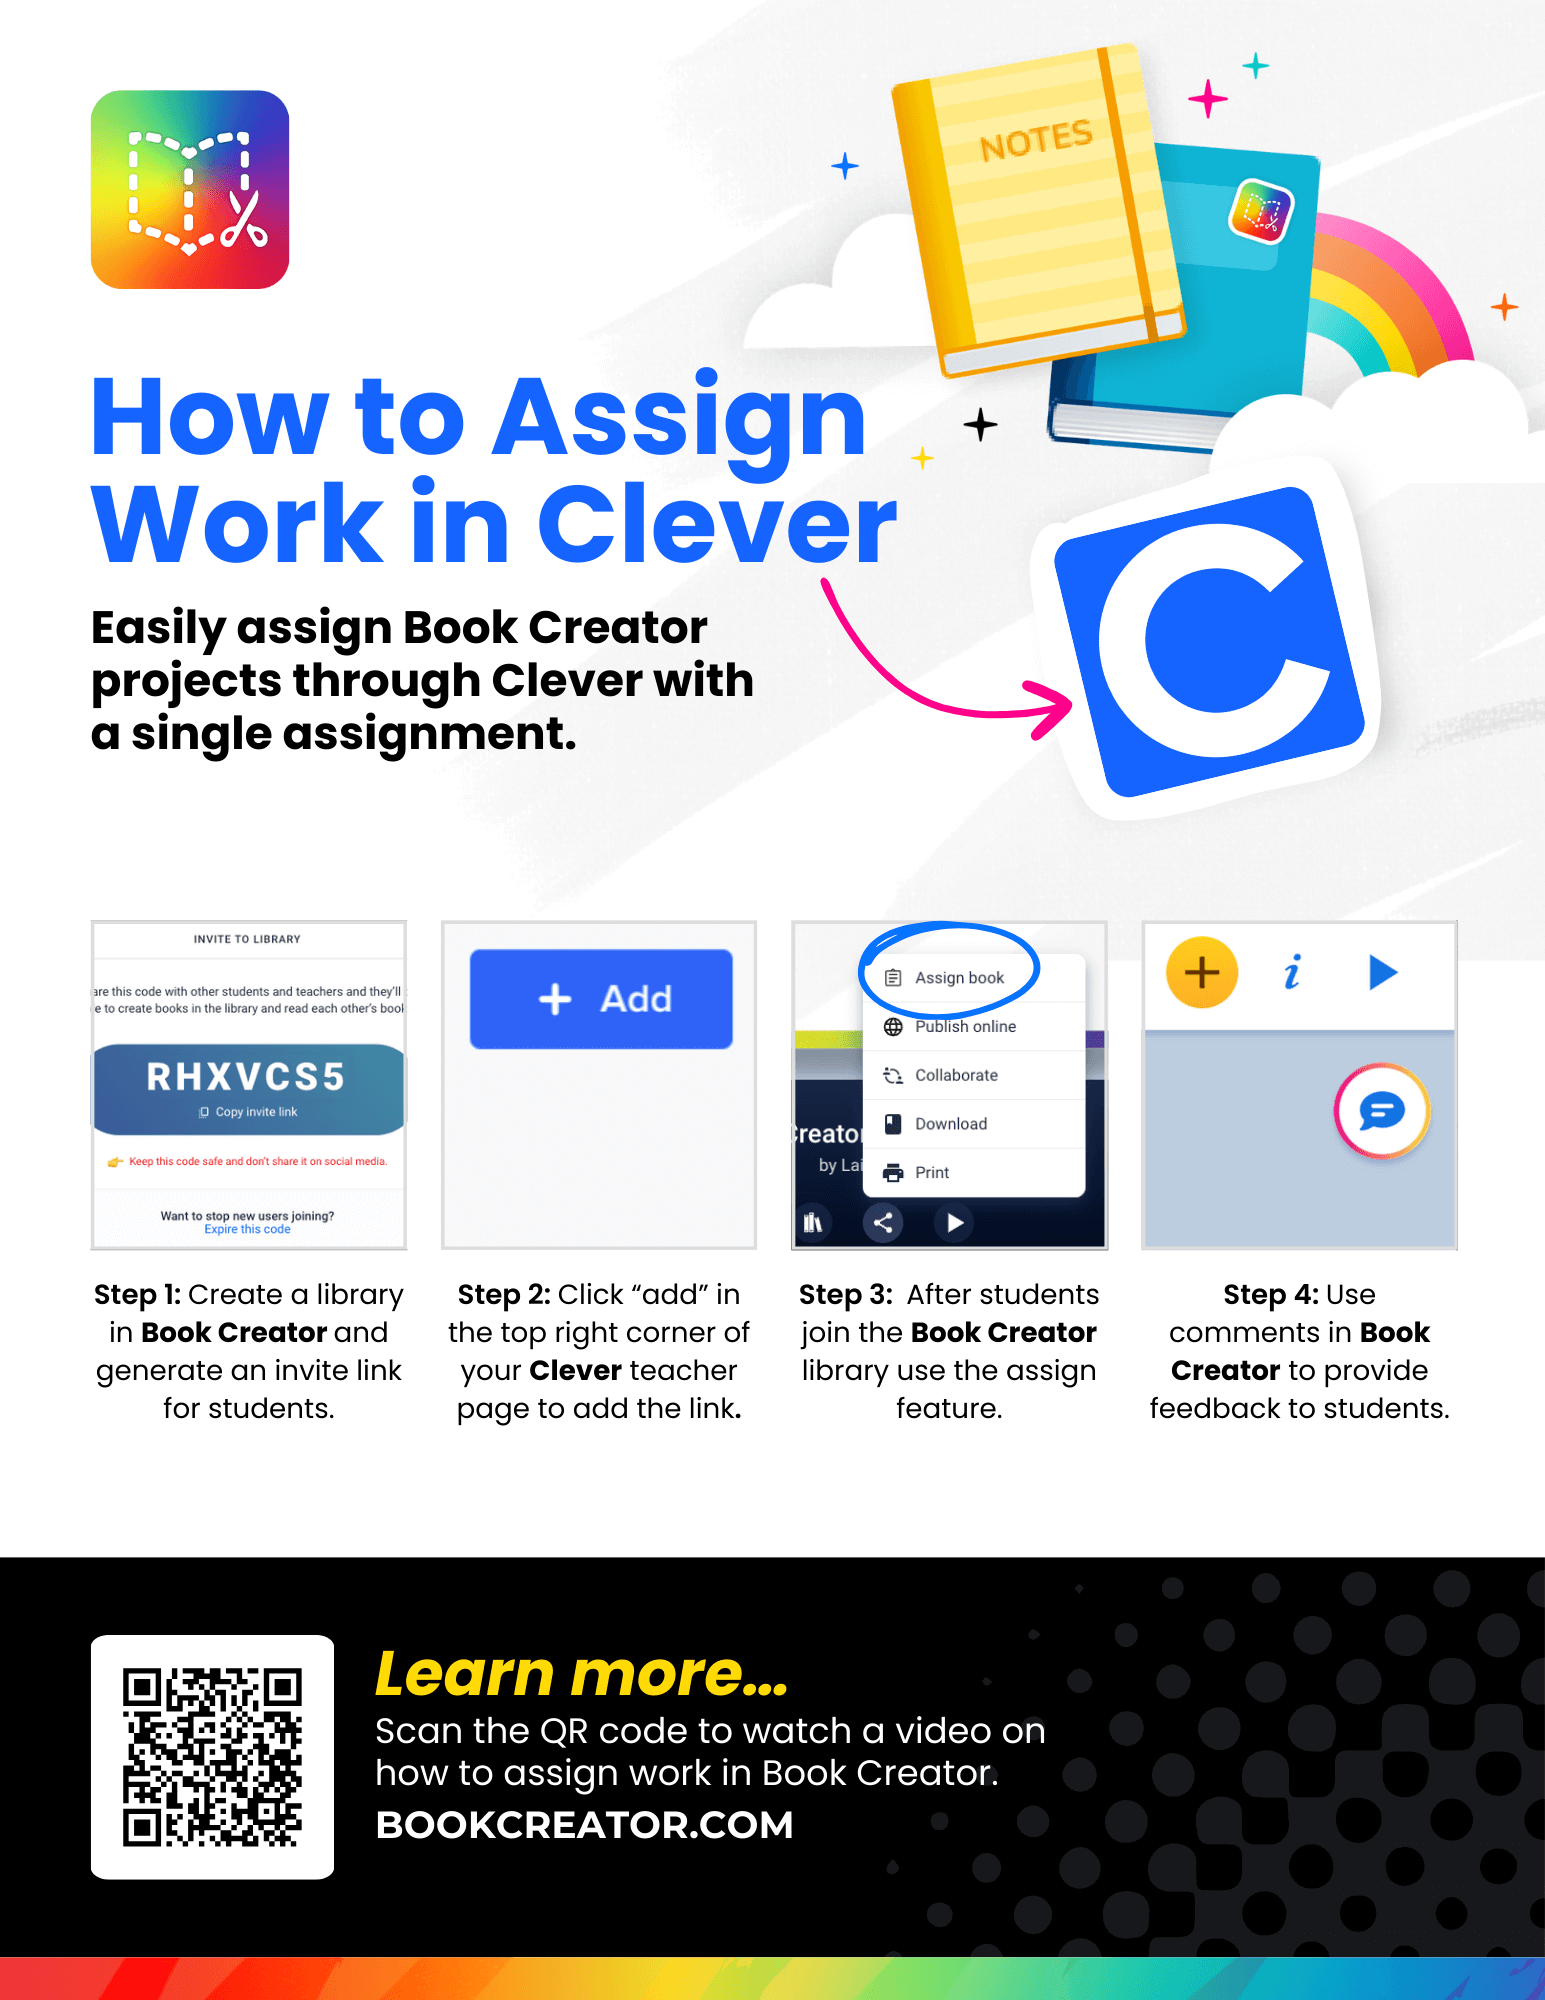
Working with Clever

One-page explanation of how students get to Book Creator from Clever.
A colorful instructional graphic titled "How to Assign Work in Clever" provides a step-by-step guide for assigning Book Creator projects through Clever. At the top, a vibrant design includes a rainbow, books, a notepad, and the Clever logo. The Book Creator logo, featuring an open book with a gradient color scheme, is in the top left corner. The main content consists of four steps: Step 1: Create a library in Book Creator and generate an invite link for students. (Screenshot shows an invite code with the text "RHXVC5S"). Step 2: Click "Add" in the top right corner of your Clever teacher page to add the link. (Screenshot shows a blue “+ Add” button). Step 3: After students join the Book Creator library, use the assign book feature. (Screenshot shows the dropdown menu with "Assign book" selected). Step 4: Use comments in Book Creator to provide feedback to students. (Screenshot shows a yellow comment button). At the bottom, a black banner with yellow text reads: "Learn more..." Users are instructed to scan a QR code to watch a video on assigning work in Book Creator. The website URL, BOOKCREATOR.COM, is also displayed. The design uses a bold, modern, and engaging layout with a combination of bright colors, icons, and screenshots.